Calibration Without a High-speed Camera
Thanks to Jake (The Instant Camera Guy), He invented a simple and effective method for shutter calibration without a high-speed camera.
Now you can calibrate by eye, or if you find it difficult to observe, you can also use the slow-motion camera on your phone.
He invented a simple and effective method to calibrate the shutter without a high-speed camera.
For boards shipped from July 2025, we begin to provide a test mode (which will be available in the App later) in which the mirror won’t move and you can use a light source to more easily observe the size of the shutter hole.
If your board is from an earlier generation, it doesn’t matter, you can use a shutter speed of 2000 for calibration.For cameras with a test mode, place a light source in the viewfinder to ensure that you can see a bright light source through the front lens or the focusing screen.
For cameras without a test mode, use a very strong light source to shine from the front of the camera, making sure you can see the shutter blades moving in the lens, by this way when the blades are opened, you can easily see the size of the hole (like a star).
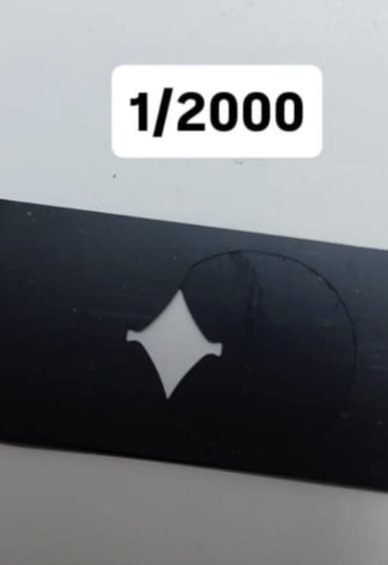
When you are ready, use the app, select “Test Mode 2000”, and then release the shutter. If the camera does not have a test mode, select a shutter speed of 1/2000.
As the shutter begins to open, watch the shutter blades, the maximum hole size is as shown in the picture below.
If you can read the hole size accurately, you can also try “Test 8000” or a 1/8000 shutter speed.
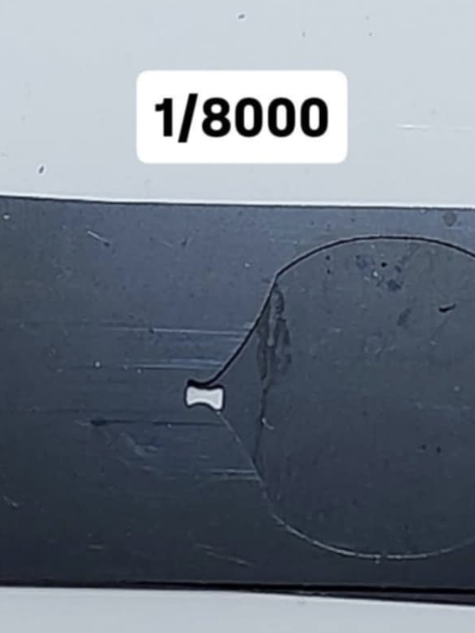
For most phones, slow motion photography cannot accurately read the aperture size at 1/8000, but it is effective at 1/2000.You need to do at least 5 observations to make sure that the hole size is the same for each time, because if the solenoid is not cleaned, it may not be able to have a stable operation.
After calibration, you can use a light meter for comparison. When the exposure given by the light meter at F8 is similar to that of the automatic mode, it means that your calibration is successful.
Some tips for determine the correct installation position of the solenoid:
Fix the solenoid slightly, and then gently push the shaft of the solenoid, as shown in the picture, when the green fixing pin of the shaft lightly touches the spring (or S4 on 4pins solenoid), the shutter blade in the lens should not be completely closed, and there is a hole close to the size like 1/8000 , but when the shaft is push to the end, the shutter blade should be completely closed.
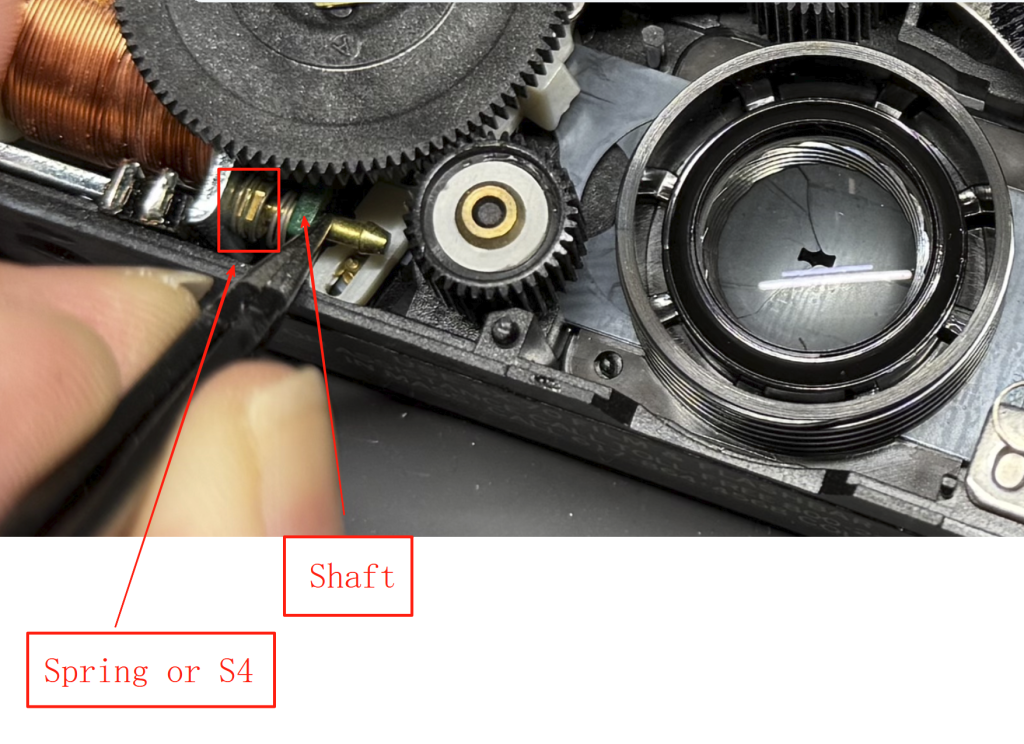
Move the screw of solenoid, check again or more, until the solenoid is correctly placed, tight the screw.
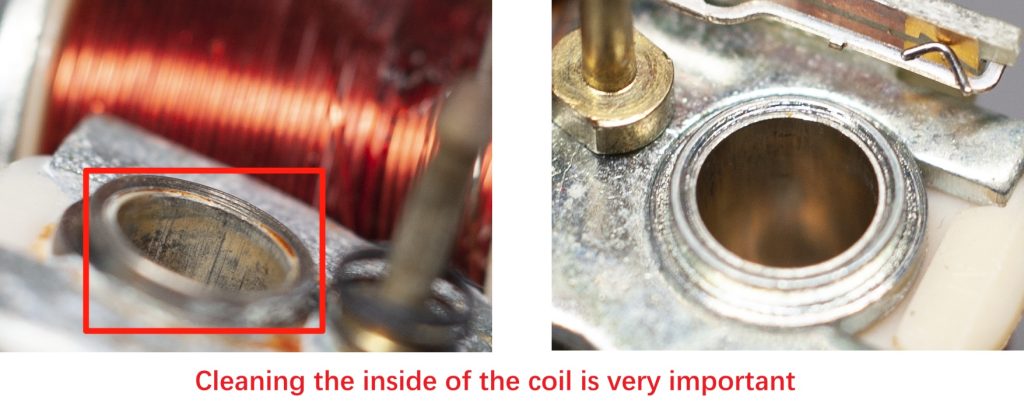
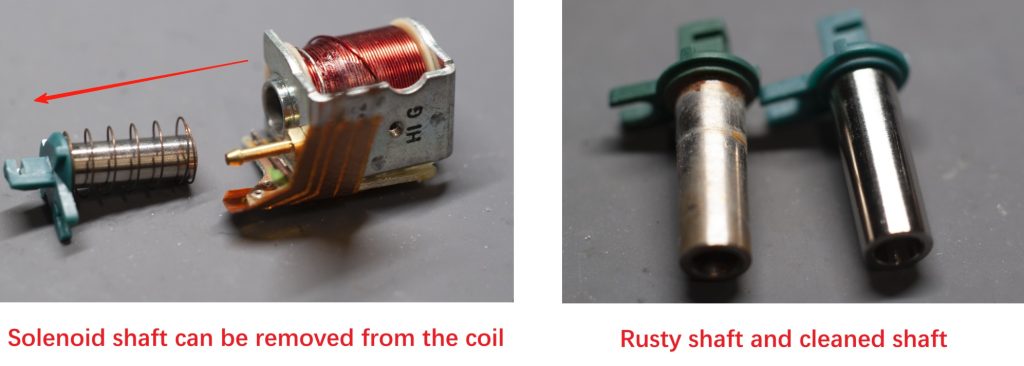
The condition of the solenoid will affect the exposure accuracy
If you still cannot get a satisfactory result after many adjustments, you can try to clean the solenoid, then re-install the solenoid according to the above requirements and try to calibrate again.